10 Tips for better mobile UX design

Layouts, menus, forms, web fonts and gestures are all things you need to consider when designing your website. 


However, you also need to think about how these elements are going to be viewed by visitors using their smartphones and mobile devices.

01. Include feedback where possible


Rollovers, hover states and animations are what bring websites to life. Add support for touch gestures, and subtle movements of iconography to draw the user’s eye. A static webpage won’t be as engaging as something that’s a bit more dynamic.

02. Forget the carousel

Every time a carousel changes, the impact of the previous slide is immediately lost. Google data suggests less than one per cent of mobile users actually engage with carousels. Don’t hide key content behind a slider – stack it and the user will do the more natural vertical scroll.

03. Build in scope for the future

If the approach is to get a release as early as possible, it’s easy to focus on only the most vital features. The problem with this approach is that it could make it impossible for developers to truly build scope. Always try to design for the most complex first.

04. Remember that less is more

The mobile experience doesn’t have to be a replication of the desktop experience. Reduce certain features and content to accommodate the user’s device and screen size. For example, a long-winded product configurator to shopping basket journey could be cut down to a simple ‘quick add’ process.

05. Design for the fickle


There’s always a risk of mobile users losing engagement and being distracted by external variables. Ideally, try to make the interface easy to pick up from where they left off. Break big tasks and forms down, and make everything simple.

06. Reuse assets where possible

One of the key pillars of user experience best practice is consistency. It is always recommended to keep a consistent library of designed UX assets across all screens, devices and resolutions. With a mobile-first approach to UX, it’s harder to ignore this rule than disregard it.

07. Listen to the best

Being the unchallenged leaders of the consumer mobile, both Google and Apple have regularly maintained documentation for UX best practice. This is hands-down the best starting point for any designer. Although guidelines could be seen to stifle creativity, it’s always best to find a happy medium.

08. Focus on real user preferences


It’s beneficial to use real users to test if a design actually works. You can make design decisions based on fact rather than preference, and reduce the chance of confusion when articulating features to developers. Real user data is also more powerful when being challenged by the subjective taste of a client.

09. Keep text alignment readable

Centred text content isn’t always bad. However, it is key to know when not to implement this. When there is lots of content, keep text to the left. If readability is a key goal of the website (it should be!), then centre-align small text blocks only. Full-page article content is almost always best being ‘left to the left’.

10. Remember the basics

Ensuring any website has an up-to-date SSL certificate, fast loading speeds and a lightweight SVG sprite sheet guarantees a better user experience. Security warnings and unnecessarily large then scaled down imagery will put barriers up, stopping users getting to key content.
Share:

6 Trends that are changing the face of UX

When I started my UX career, the iPhone didn’t exist. I was wireframing screens for car navigation systems using PowerPoint. User experience consisted of interacting with the touchscreen interface with their fingers or voice. Tap was the only gesture; there was no swipe, pinch or slide. There were quite a few voice commands but they were difficult to recall, and you had to say them a specific way. Even then, the system didn’t understand it most of the time.


Today, when new web design tools are released every day, swipe is the new click. Technology has made it possible for us to talk to computers as if they were human. We’re designing experiences for multiple platforms using design-specific tools. The rules have changed: the next generation of UX designers will face new challenges that will impact our everyday lives.

Here’s a look at some of the themes that are changing the face of UX.

01. Conversational UX

Hey Siri, find a table for six in Los Angeles tonight. OK Google, take a selfie. Alexa, ask Uber to request a ride. Tech giants Apple, Google, Amazon and Facebook have embraced conversational interfaces. Virtual assistants and chatbots have exploded onto the scene. We’re seeing a growing number of applications with invisible interfaces; applications with no commands to remember or user interfaces to learn. Users can just type or talk as they would to their friends or family.

Conversational UX will be one of the biggest shifts in how people interact with devices. Natural language recognition is progressing at a rapid pace. Frictionless computing can be a reality.


The Amazon Echo and Google Home are AI-powered virtual assistants that have no physical interface – users interact with them entirely through vocal instructions

So what does this mean for user experience designers? We won’t be designing visual interfaces as often. Instead, we will design experiences through conversations – experiences that help users achieve their goals. The future of interaction is screenless.

These are some things to consider for your conversational UI designs:
  • Start with a quick introduction and explanation of what you do
  • Make it clear the person on the other side is a bot and not a human
  • Avoid open-ended questions; encourage a specific answer
  • Acknowledge valid answers before moving on to the next question
  • 
Focus on micro-copy that is natural 
and represents the brand
Conversational UI is still in its infancy. As designers, we have the opportunity to shape the experiences we want. Through the power of conversation, computers and humans will finally be able to speak the same language.

02. Focused design tools

It was only a few years ago that designers had to hack existing tools when designing for the web. They’d retrofit tools like Photoshop and Illustrator to create wireframes, flows and mockups.

Organizations now realize the importance of a great user experience and are willing to invest in it. New web design tools or sets of updated features are frequently released and are all vying to be a part of the designer’s workflow.

Currently leading the way is Sketch, a tool focused on interface design. With a robust set of powerful features and plugins, it has become the go-to for most designers. Competitors have taken notice.

Adobe got into the game with XD. It differentiates itself from Sketch by adding a prototyping component and Windows compatibility. Another tool that has been gaining popularity recently and could offer a glimpse towards the future of design tools is Figma. It runs in a web browser and allows for real-time collaboration. CAD-inspired design tool Subform adds another new dimension – it focuses on the unique constraints of responsive layouts.

The prototyping game continues to evolve. InVision launched a plugin for Sketch and Photoshop called Craft. Craft helps users design with real data, sync styles, and prototype within Sketch. Facebook has developed its own prototyping tool called Origami Studio. And Framer continues to push updates, making it easier to design with code.

03. A mobile future

In 2009, Luke Wroblewski wrote that websites should design for mobile first. Mobile users were growing at an alarming rate. Mobile internet adoption was on the rise. Time spent in mobile apps kept going up. It was clear mobile was here to stay.

Fast-forward to today and the numbers don’t lie. There are more smartphones in the world than PCs. The time spent in mobile apps dominates the web browser. A growing population of people no longer use a PC at all. Smartphones have changed the way we communicate with each other and access information. Yet the mobile experience is still riddled with bad UX.

04. Integrated experiences

If we are to design for tomorrow’s mobile experiences, we can’t be guided by today’s constraints. Phones will get smarter and more integrated and powerful.

Apps are beginning to scratch the surface of contextual experiences. Enter a restaurant and get a suggestion of what to order, based on your preferences. Got a meeting across town? Your phone will tell you when to leave, based on traffic. In the future, the camera will act as another context-aware source – it will be an extra eye that can understand what it’s seeing in real time.

We’re starting to see more integration of data and services. Instead of opening a specific app to complete a task, we’ll be able to do it via voice or inside another app. Apps that don’t integrate with each other will seem like a broken user experience.

We’ll interact with the other devices in our home, car and at work. To provide the best experience, all devices will talk with one another. The phone will be the one device that’s always with us; the hub of the frictionless experience. The apps that will become a part of our everyday life will be the ones that can best anticipate our needs.

05. Building a library


Creating and maintaining an effective design system requires a huge investment. The Airbnb team created its system by first identifying the inconsistencies in its products. Designers printed out their designs and laid out the screens side-by-side. They audited the flows in order so they could see where the experiences were breaking. Principles helped inform their decisions to standardize on components and design patterns.

A pattern library acts as a centralized hub for all components of the user interface. Effective pattern libraries provide pattern descriptions, annotations and contextual information. They also showcase the code and pattern variations, and have the ability to add real data into the pattern structure.

Once a design system is up and running, it’s only the first step in the journey. It needs to be living. Nathan Curtis, a co-founder of UX firm EightShapes, says: “A design system isn’t a project. It’s a product, serving products.” Like any good product, a design system needs maintenance and improvements to succeed. Both Google and Salesforce have teams dedicated to improving their design systems. The goal is a workflow where changes to the design system update the documentation and the code.

The benefits realized by a thoughtful, unified design system outweigh the effort involved in establishing one. There is a consistency across the entire user experience. Engineers and designers share a common language and systems are more sustainable. Designers can spend their time solving harder problems and the actual user experience.

06. The UX of virtual reality


Google’s best practices when designing for virtual reality includes just two main rules: Designers should avoid simulator sickness and establish user familiarity with interactions

User experiences are not limited to a desktop or mobile screen – many everyday objects now connect to the internet. One of the more exciting design challenges is virtual reality, which has been around for some time but has recently become more accessible, thanks to headsets like the Oculus Rift.

Designing an immersive experience is not the same as designing for a flat screen. Design principles for two-dimensional screens don’t always translate to three-dimensional environments. A new medium means new rules, interactions and patterns.

Moving on

Design has come a long way. Mobile is the face of digital. Organizations are creating large-scale design systems and a culture of design. Tools for designers are becoming more accessible. We have had a small taste of the power of conversational UX and virtual reality.

When I was designing car navigation systems, the goal was to get drivers to their destination. Now, we’re seeing cars that can drive themselves and are safer than humans. As technology is always changing, so will the rules of UX. Now more than ever, it’s an amazing time to be a user experience designer.
Share:

Build the next killer app with this course bundle

Whether on web or mobile, apps make the world go around. These powerful tools have become ingrained in our lives thanks to the incredible functionality they provide. Now you can learn to build apps that people will be sure to love with the Complete Application Development Bundle.


Even the most simple app looks more complicated when you crack open the hood. With the Complete Application Development Bundle, you'll learn to understand the inner workings of applications. 

With more than 35 hours of in-depth content about app development, this bundle is the perfect crash course for anyone interested in building their own apps. Master frameworks, learn to use powerful developer tools, and create your own killer app.

About Creative Bloq deals

This great deal comes courtesy of the Creative Bloq Deals store – a creative marketplace that's dedicated to ensuring you save money on the items that improve your design life.

We all like a special offer or two, particularly with creative tools and design assets often being eye-wateringly expensive. That's why the Creative Bloq Deals store is committed to bringing you useful deals, freebies and giveaways on design assets (logos, templates, icons, fonts, vectors and more), tutorials, e-learning, inspirational items, hardware and more.
Share:

6 mobile apps every web designer should check out

Many web designers never think of using mobile apps to aid them in their work. But new mobile apps are being released all the time, and it’s easy to miss something that could profoundly change the way you work for the better.

In this post we round up some of the latest new and newly updated mobile apps that could make your web design work more productive, effective and fun. And who wouldn’t want that?

01. Dribbble (iOS)


Founded in 2009 by Dan Cederholm and Rich Thornett, Dribbble has become the go-to place for web designers to share sneak peeks (aka ‘shots’) of the designs they’re working on, and invite comments and discussions around them. But perhaps surprisingly, Dribbble has never launched a mobile app to complement the service... until last month.

Available through the App Store for iPhone and iPad, the new Dribbble app is completely free to download. It provides interactions like double-tap to ‘like’ and pull to refresh, as well as faster browsing and iPad split screening, to make Dribbble easier to use on your devices.

Additionally, support for Handoff means you can browse Dribbble on the go, then view the same content back at your desktop. Plus support for Universal Links means that all links to dribbble.com will open directly in the app, rather than the browser.

02. Sketch Mirror (iOS)


If you regularly use Sketch to prototype your web designs, and you have an iPhone or iPad running iOS 9 or above, then you’ll want to check out Sketch Mirror. This iOS counterpart app from Sketch allows you to preview your designs in near real-time on any iPhone or iPad over a Wi-Fi network, wherever you are.

Sketch Mirror is optimised for the iPad Pro and supports Split View and multitasking. Through the Sketch Mirror overview, you can quickly browse between artboards on different pages, and if you lose your connection, the app will automatically switch back once it’s restored.

03. Adobe XD mobile (iOS or Android)


Released in preview in 2016, Adobe’s Experience Design CC – or Adobe XD – is a wireframing and prototyping tool that has quickly established itself as a key part of the Creative Cloud. And its accompanying mobile app lets you preview your designs on both iOS and Android devices.

If you’re using Adobe XD on macOS, you can make design and prototyping changes on the desktop, and see them reflected in real time on all mobile devices connected through USB. Alternatively, both macOS and Windows 10 users can load Adobe XD documents from Creative Cloud Files. Just place your XD documents in your CC files folder on desktop, then load them into your devices using Adobe XD on mobile.

04. 920 Text Editor (Android)


There are dozens of text editors available for Android, but 920 Text Editor is our favourite. If you’re writing code on a small screen, you want your editor to be clean, lightweight and responsive, and this one ticks all of those boxes.

There are also some pretty nifty features: Multi Tab lets you open different files in different tabs for easy switching; you can lock the screen orientation into horizontal or vertical; and there are lots of cool shortcuts, such as using the volume keys to quickly switch the display or hide the toolbar.

By default, 920 Text Editor supports CSS, JavaScript, ASP, ActionScript, C/C++ , C#, Erlang, Frink, HTML/XML/WML, Java, JSP, Perl, PowerShell, PHP, Python, and more.

05. Things 3 (iOS)


Unless you’re one of those rare web designers who’s naturally super-organised, you’ll be needing a decent to-do app to stay on top of your projects. Things has been around for a while, but if you dismissed it before, it’s worth taking another look at the latest version, Things 3.

Based on the productivity system known as GTD (Getting Things Done), Things was a big hit on its release in 2008, due to its clean UI and seamless integration with other services. But the latest version pushes its attraction further.

The main highlight is a new integration with your calendar app (Google or otherwise), which means you can view upcoming tasks alongside your other commitments, appointments and reminders. Things 3 also shows your progress on tasks, through the visual metaphor of empty circles, which get more filled-in the closer you get to completing them.
Learning to code a new language, such as Swift or Python, doesn’t sound like a fun activity, but Py makes it so by turning it into a game.

Offering more than 1,000 free lessons, this mobile app teaches you to code in bite-sized, gamified chunks, and there’s also a social element to encourage you to complete your training.
Share:

10 top 3ds Max tutorials

Autodesk's 3ds Max is one of the most popular 3D packages around, but learning how to make the most of its extensive toolset and powerful features is a serious challenge, especially if you're just starting out in 3D.

That's why we've put together this collection of brilliant 3ds Max tutorials that'll provide you with plenty of useful tips for creating show-stopping 3D art. Whether you're new to 3ds Max and could use advice on getting started with it, or if you're a more advanced user in search of professional solutions to tricky problems, you'll find help here.

01. Getting started


If you're just starting out with 3ds Max then where better to go for helpful tips on familiarising yourself with the basics than to Autodesk itself? Its guide to the basics – from getting to grips with the interface and planning your project workflow, through to the essentials of building, lighting and rendering your scene – is a great, no-nonsense way to learn all about what you can do with 3ds Max.

02. Using normal maps in 3ds Max


When you're making static scenes or animations you don't need to worry too much about adding as much detail as you want to your build. But if you're building for games or interactive playback, too much detail can really clobber performance, so the best way to give your builds that extra layer of detail is by using normal maps, and this tutorial from Autodesk will take you through the basics.

03. Animate a car path


While a package like 3ds Max makes it relatively easy to create incredibly lifelike renders and animations, failure to pay attention to the little details can completely wreck the illusion. This tutorial from Autodesk is a perfect example; following on from an earlier guide to animating a car, this one tackles all the things you need to do to make it look like the real thing, such as making the wheels spin at an appropriate rate, and turning the front wheels and rolling the body of the car when turning a corner.

04. Master large-scale environments in 3ds Max


The most impressive use of 3ds Max can be to create massive, detailed landscapes that look indistinguishable from a photograph. The downside, though, is that they can take an age to build from scratch, and if you're not careful then your beautiful scene will prove to be too much for your renderer to handle. Here you'll learn how to use a pair of 3ds Max plugins, Forest Pack and Railclone, to make a scene with hundreds of thousands of objects and procedural geometry, that won't bring your workstation to a standstill.

05. Sci-fi ships in 3ds Max


If there's one thing that's likely to give you the urge to become a 3D artist, it's seeing an epic spaceship do its thing on the big screen. And if you follow this three-part tutorial from Victoria Passariello, you'll learn everything you need to know about building your own stunning spacecraft from scratch, from building the base model through to adding all those essential details, creating suitable textures for it and finally rendering the finished piece.

06. 3ds Max 2017 Essential Training


This nearly 10-hour guide from Lynda.com covers 3ds Max 2017 from the ground up, providing an overview of the entire package as well as essential skills that 3D artists need to create professional models and animations.

07. Lighting and rendering in 3ds Max using Mental Ray


In this tutorial from 3D Total, learn how to light and set up some materials in 3ds Max using Mental Ray that gets good results while also having a fast render time.

08. Create amazing 3D type


3ds Max has some amazing and creative ways to make your type look absolutely beautiful. In this tutorial. Jeya of Media Militia reveals how to extrude text, tweak it out, manipulate the mesh, and then export it out to Photoshop to add in some extra elements.

09. How to create a chrome material


From the team at Florence Design Academy, discover how to create a chrome material, one of the most used materials in the 3D design field.

10. How to model a hand


3D artist Hatrice Bayramoglu's free tutorial over on CGArena shows how to model a hand from a sketch. Using polygonal modelling technqiues, the process start using the hand sketch as a blueprint.
Share:

The 10 commandments of Photoshop etiquette

As a designer, chances are you use Photoshop CC as part of your Creative Cloud package. And at some point in your career you will have a job or project where the end goal is to pass your Photoshop files onto someone else. This step doesn't get covered in many Photoshop tutorials.

Many of us have been on the receiving end of that relationship. And many of us will remember a time when we've opened up that PSD file and thought: What on Earth is this?

So if you want to avoid damaging relationships and getting yourself a bad rep within the design community, you need to understand, and follow, these basic rules of Photoshop CC etiquette. These rules may seem like a pain, especially when you're used to working in your own way, but if you get into the habit of sticking to them, they'll save you a great deal more pain in the long run.

If you know your Photoshop skills could do with an update, why not make a start with our pick of the best Photoshop tutorials?

01. Name your layers


As boring and mundane as it sounds: name your layers. This is the most basic rule of them all – even if it's a simple, descriptive name such as 'Arrow'. There's nothing worse then trying to find a certain layer within a file containing countless duplicates of 'Layer Copy'.

Once labelled, organise these layers into group folders, allowing you to move and show/hide various large sections with ease. Layers such as backgrounds or other solid elements that you wish to be preserved should be locked to ensure they don't get clipped or moved accidentally.

Once you've completed your task, it's always worth having a quick glance over your file to filter out and delete any unnecessary empty layers (a good way to check if a layer is empty is pressing cmd+T). You'd be surprised how many crop up.

02. Structure your files logically

Establish a simple naming convention that not only works for you, but would also make sense if your granny had to read it. Naming conventions such as 'New', 'Latest' or 'Website-Final' won't cut it (you can almost guarantee that it won't be the 'final').

An example of a good naming structure could be: 'Name_Type_Size_Version'. Why this structure? The company name is the first thing you see to identify the brand of the file. 'Type' illustrates what the file is intended for (Website, Email, etc). 'Size' is only applicable in certain cases such as banners, whereby you will have various sizes (for example: 120 x 600 or 300 x 250), and finally 'Version', which could be simplified to 'v2', 'v3' and so on, can be applied when making revisions to the original file. It's good practice to save each progression as another file, in case you need to refer back to previous versions.

Including these variables in the file name is a smarter way to organise your files and will definitely eliminate any future confusion.

03. Mask once


This refers back to point 1 and grouping layers: why apply 10 masks on 10 layers when you can group the lot and mask once?
04. Save your paths

The Pen tool to a designer is like the lightsaber to a Jedi. The better you are at using it, the more powerful your skills become. So once you're done spending hours making the perfect clipping path, be sure to save it, otherwise you risk having to do it again later in the job.

05. Don't stretch text or images


Never stretch buttons or vector shapes out of proportion; especially ones with rounded corners. Always redraw them to ensure you get the correct and consistent shape and style. Don't stretch images either; scale (down, never up) and transform but don't stretch out of proportion.

The same applies to fonts; kern, track and scale but whatever you do, absolutely do not stretch. Ever. It's very unprofessional.

Using smart filters where possible will ensure vector shapes can be made bigger and smaller with no distortions. It's handy to bear this in mind when designing for mobile and Retina displays.

06. Snap to something

One sign of a good designer is alignment, so switch on those rulers and get snapping: Snap to grid. Snap to Pixel. Snap to Layer. Snap to something! This ensures both that your designs are pixel-perfect and that all elements within them are easy on the eye.

07. Apply effects gracefully

Avoid the temptation to apply Color Overlay, Drop Shadow, Bevel, Outer Glow and Strokes to each and every element of your design. It's a tool job – know the difference between each one and when to use it. The main objective should be to use effects that complement the design and elevate your user experience. Subtlety is the key.

If you're applying the same effect on numerous elements then its always worth copy/pasting the layer styles to ensure the effects are exactly the same. Also, be aware of the Global Lighting option and when this needs to be applied. When in doubt, turn it off, so you can customise each element and effect to your liking. Otherwise one day you'll be wondering who changed all the styles in your design.

08. Collect up unused styles and images

After experimenting with various styles or images, it's good practice to put all these unused elements into one folder titled something like 'Unused'. Have it switched off at the bottom of the original file (it can be deleted on copied revisions thereafter to keep file size down).

This rule is an exception to the general rule about removing unused layers. It follows the same logic as keeping various little elements such as icons and small imagery handy just in case you need to make quick changes or additions.

09. Proofread your designs

Many designers are bad at spelling, so check your text and grammar thoroughly. Ensure everything is spellchecked (and that includes the brief and copy provided) so your work can clearly be read and understood.

10. Make everything easy to find

Once you're all done with your design, be sure to store it in a relevant location with all stock imagery, web files and so on nearby – not in a random folder called 'design files' or 'misc'. Otherwise you'll probably never find it again, and others certainly won't.
Share:

The 9 best alternatives to Photoshop

You could be mistaken for thinking there are no real Photoshop alternatives around. Photoshop is such a powerful brand that, like Google, it has actually become a verb: 'to Photoshop' is shorthand for editing an image. This might make you believe that no other software could possibly do as good a job, and stop you from looking any further for your image editing needs.

In fact, Adobe doesn't necessarily have the market cornered and the backlash against Adobe's move to the Creative Cloud in 2013 actually helped to spur on a wide range of alternatives to Photoshop. These options can be just as powerful, and produce results that are just as professional.

So whether you're looking elsewhere because you can't afford the subscription, you want to support smaller development houses, or you just don't need all the millions of features that come with Photoshop CC, there are a number of image editing tools open to you. Here are the best Photoshop alternatives.

01. Affinity Photo

  • Platform: Mac, Windows, iPad
  • Price: £48.99/$49.99 (one-off payment)
Fully compatible with Photoshop and other file formats, Affinity Photo is aimed squarely at professional photographers and designers, and although it is hugely cheaper than Photoshop (with no subscription), its creators argue it's actually better. We think it's perhaps the most serious Photoshop alternative we've seen to date.

It comes with a promise of higher speeds, fewer crashes and unlimited undos but in truth, the amount of improved performance you'll get will probably depend what equipment you're using (it's been specifically designed to take advantage of the latest quad core technology).

Available on Mac and Windows, Affinity Photo for iPad had an update in 2018. If you're looking for an alternative to Photoshop, Affinity Photo is definitely worth investigating.

02. Sketch

Sketch is a professional vector graphics app for creatives that has created enormous buzz within the design community, and web designers in particular.

The development team behind Sketch has made it as flexible as possible, with it supporting infinite zooming and vector shapes that are perfect for multiple resolutions. You can build a new graphic from primitive shapes or start a new one with the Vector or Pencil tool.

It has a pleasingly simple UI and has many features similar to that of Photoshop and Illustrator, including layers, gradients, colour picker and style presets. Its popularity means there are also plenty of community-created Sketch plugins you can use to extend its functionality.

If you're looking for vector graphics software, it's also worth checking out Figma. Figma is browser-based, totally collaborative and it is creating enough noise to be some serious competition for Sketch.

03. GIMP

  • Platform: Linux, Windows, Mac
  • Price: Free
A free, open-source alternative to Photoshop that's been around for donkey's years, GIMP stands for GNU Image Manipulation Program. Today it's available in versions for Linux, Windows and Mac.

GIMP offers a wide toolset, similar to Photoshop in many ways, and is a great option if you're looking for a no-cost image editor. The interface differs somewhat from Photoshop, but a version of GIMP is available that mimics Adobe's look and feel, making it easier to migrate over if you're ditching Photoshop.

The full suite of tools is available here – everything you're accustomed to is within easy reach, including painting tools, colour correction, cloning, selection, and enhancement. The team that oversees development has worked hard to ensure compatibility too, so you'll be able to work with all the popular file formats without any trouble at all. You'll also find a very capable file manager built in, along similar lines to Adobe's Bridge.

Overall, this is a great option whether you've either got a limited budget, or want to move away from Photoshop for other reasons.

04. Pixelmator Pro

  • Platform: Mac
  • Price: $39.99
Pixelmator has been around for a while now, but more recently the team released the Pixelmator Pro. While the previous tool used floating windows, the Pro version has a more usable single-window UI, and offers non-destructive image editing. The team have pared back the interface, which should make it easy to pick up – and there's a 'hidden interface' option you can activate if you just want to see your image, with no distractions.

This Photoshop alternative is geared up especially for use on a Mac, and it supports features like tabs, fullscreen and split view.

05. Pixlr

  • Platform: iOS, Android, web app
  • Price: Free
Pixlr is a free Photoshop alternative that boasts more than 600 effects, overlays and borders. It also lets you do all the main things you'd expect from a basic photo editor, from cropping and re-sizing to removing red-eye and whitening teeth.

And if you're used to using Photoshop, then you'll find Pixlr's user interface easy to pick up quickly, as it's very similar. This free app is available in both iOS and Android varieties, or use can use it as a web app.

06. Corel PHOTO-PAINT

  • Platform: Windows
  • Price: $599.99 / £599.99 (entire CorelDRAW Graphics Suite) or try for free
PHOTO-PAINT is a dedicated photo editor in the CorelDRAW Graphics Suite. The suite has been updated for 2018 to offer a Corel AfterShot 3 HDR support, as well as interactive tools for straightening photos and adjusting perspective. There's also improved stylus control, with the PHOTO-PAINT responding to different pressures, bearing tilt and rotation.

The suite is geared up to work perfectly with Windows 10, offering multi-monitor viewing and support for 4K displays.

07. Paint.net

  • Platform: Windows
  • Price: Free
Paint.net is a Windows-based alternative to the Paint editor that Microsoft shipped with versions of Windows. Don't let that put you off, though: it's a surprisingly capable and useful tool, available completely free of charge. The software started out life as a Microsoft-sponsored undergraduate project, and has become an open source project maintained by some of the alumni.

The focus is on ease of use, and there's a definite tendency towards photo editing rather than artistic creation. That said, there are a range of special effects available, allowing you to easily create fake perspective, blend and push pixels around the canvas, tile and repeat selections, and so on.

A good range of selection tools, support for layers, and adjustments such as curves and brightness/contrast mean that Paint.net is a great alternative to Photoshop for photo editing, especially if you can do without some of the more recent additions to Photoshop's toolset.

08. SumoPaint

  • Platform: Browser or iPad
  • Price: Free (basic), $4/mo (Pro)
SumoPaint is a highly capable, free browser-based image editor. All the standard features you'd expect from a desktop tool are present and correct. It's lightweight and quick to load, and the free version is very usable. There's also a paid-for Pro version and a paid-for iPad app.

The standard range of tools and adjustments you'd expect are all included. Brushes, pencils, shapes, text, cloning, gradients, etc are all quickly accessed from the Photoshop-esque floating toolbar. It can also open saved documents from your hard drive, making SumoPaint a perfectly viable option for editing and reediting.

Some tools work in different ways to Photoshop, offering possibilities that would be difficult to match in Adobe's offering. There are, however, limitations that will put off some users.

09. Acorn

  • Platform: Mac OS X
  • Price: $29.99
Image editing software Acorn debuted back in 2007 and has provided hobbyists and artists on a budget with a great, affordable alternative to Photoshop ever since. Features of the software include layer styles, non-destructive filters, curves and levels, blending modes and much more.

The most recent edition – Acorn 6 – includes new Scale and Transform options, the ability to use the Clone tool across layers or images, and the ability to use emoji on a path (if you so wish).
Share:

Switch from Mac to Windows: A 3D artist's guide

Since the dawn of the personal computer, a battle for platform supremacy has raged between macOS and Windows. While Windows is the dominant force in nearly every area of business, Apple and its macOS has for a long time been the weapon of choice for creatives.

While there are now better reasons for staying entrenched on macOS, there are still a large number of reasons to consider a switch to Windows – or at the very least operating a hybrid environment. In this article, we'll take a look at what Windows has to offer digital artists.

Not sure whether to switch or not? Take a look at our guide to the best computer for designers to help you decide.

Windows versus macOS

Fundamentally, a computer is a tool, and if you're creating digital or 3D art or video work, you'll need bespoke tools crafted to your specific needs. That means a fast pen-enabled, multi-core CPU for modeling tasks, and enough graphic card grunt to make the most of the latest generation of GPU-accelerated workflows and render engines.

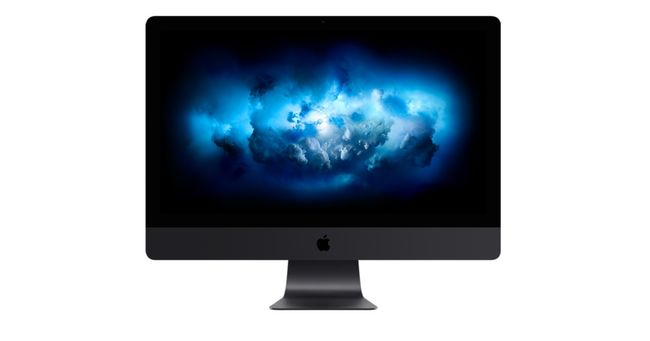
With the launch of the iMac Pro, the i9 MacBook Pro, the new, more professionally focused
Mac mini and potentially a new modular Mac Pro on the way, Apple has stepped back into the professional marketplace. However, this impressive hardware does come at a price – both financially and in terms of potential upgradeability.

That said, the iMac Pro still a very compelling option for a large number of digital content creators. With Thunderbolt 3 and solid external GPU support now key parts of macOS, can this new push by Apple make macOS-based 3D artists ignore the pull of Windows?

Windows: The pros

As an artist who has used a mixed Windows and macOS environment for my professional work for the past four years, I can offer some insight to macOS users who might want to make the switch.

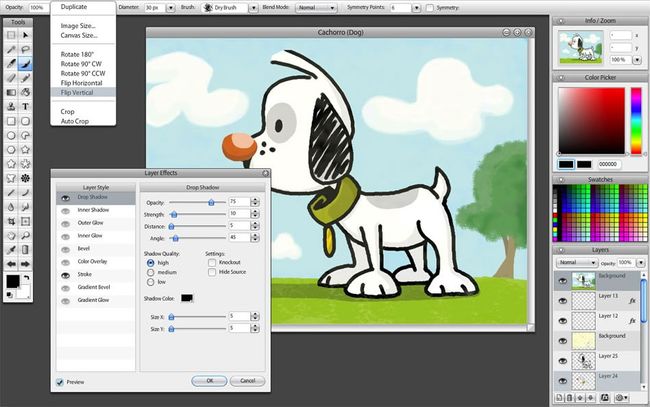
Let's start by concentrating on the good points about Windows. First of all, app switching is, on the whole, pretty painless. Most software is now tied to the user and for all the big names – Cinema 4D, Maya, the Substance suite and Adobe's Creative Cloud suite – you can access your account by simply logging in and downloading the Windows version. It's the same with most plugins.

The second benefit of Windows is its speed – I have always found viewport performance in 3D apps to be superior on Windows to Mac.


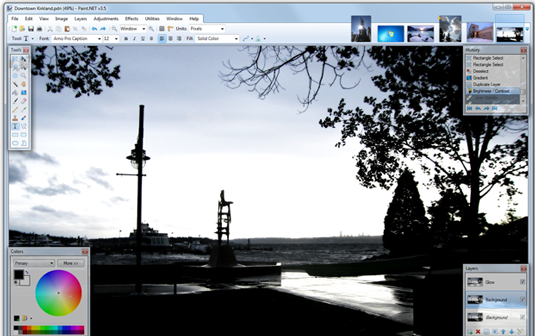
As for Windows itself, Windows 10 is very solid, and Windows Explorer is more 'malleable' than the Finder in Mac OS. There is also a raft of solutions available to make Windows feel more Mac-like, such as the FastPictureViewer codec, which shows thumbnails for a huge range of image formats, and DJV, which can act as a good media player.

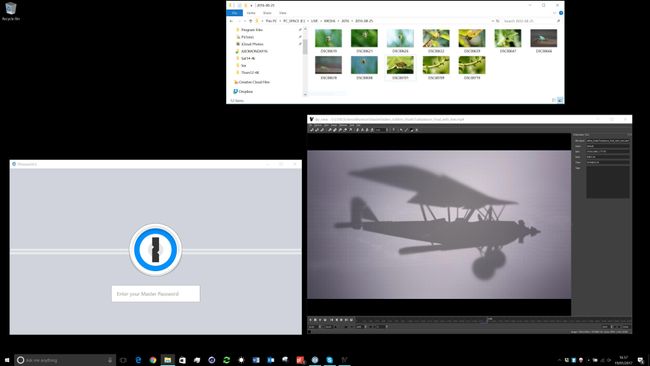
If you're worried about losing access to your favourite productivity applications, fear not – a lot of previously Mac-only apps are now available for Windows. For example, I have depended on 1Password to hold of all my password details for years; with the 1Password account feature my Windows PCs, iOS devices and Macs are now all synced.


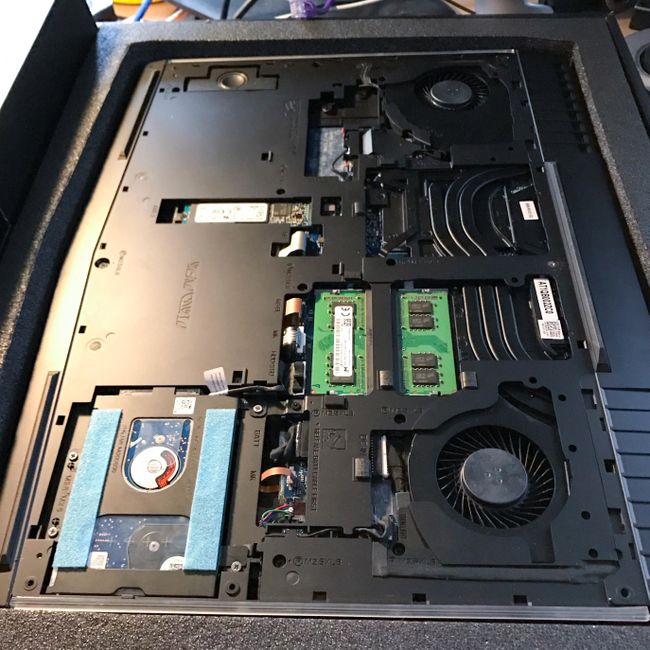
Then there is the hardware itself. 3D and video artists are dependent on power, and a decent GPU-enabled desktop can be bought for the fraction of the cost of a Mac with equivalent power.

GPU render engines such as Redshift and Octane are better tuned to Windows at the moment, and the latest macOS only supports AMD graphics cards as Nvidia has not yet released drivers for MacOS 10.4 Mojave. If your video editing software is dependent on Nvidia-powered GPUs for CUDA acceleration – common both in 3D render engines and video editors – using a Windows machine is currently the only option.
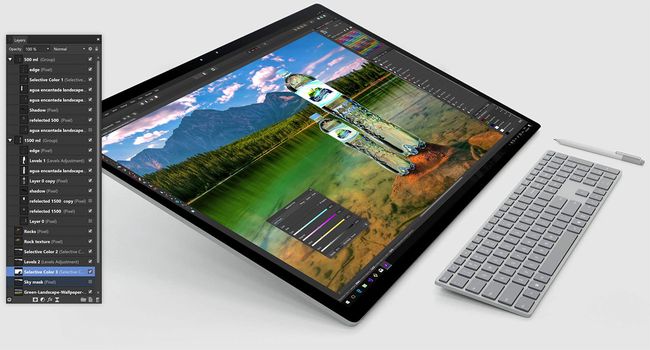
The biggest advantage to moving to Windows is that there is a much wider choice of form factors available to you: everything from touchscreen laptops to enormous 12 GPU card-equipped desktops and tablet computers that are capable of any 3D work you want to throw at them. The odds are, there is likely to be a Windows machine that could suit a bespoke working environment more readily than a Mac.

Windows: The cons

While on the surface, performance, value for money and configurability all seem like obvious wins for Windows, there are potential downsides to consider. Until relatively recently, Microsoft didn't make its own hardware, and compared to macOS, a Windows machine can still can feel like a selection of parts and drivers.

There is not the hardware quality, consistency and the reliability of a Mac (especially for those of us who have access to an Apple Store). The macOS still 'looks' better out of the box, and has a lot of helpful bundled applications, including Preview, QuickTime player and the excellent Finder preview, quicklook and column view. These can be replicated on Windows but only with the use of third-party apps or hacks. In terms of backup, Time Machine is still a better one-stop solution.

In my experience, Macs are more dependable. Whenever I have taken a PC laptop out on a job with me, the battery has either run down because a background process has failed to quit, or the machine has only run at half-power because the CPU and GPU are being throttled.

Compare this with the latest MacBook Pro, which does not throttle down any component while on battery power. The MacBook Pro also has an incredible standby time when the lid is closed and it's dropped into a rucksack.

The latest generation of Macs are also very quiet in operation. I don’t think I have ever heard the fans of an iMac Pro, even when running 3D applications or motion graphics applications such as Adobe After Effects.

Although expandability is still an issue on macOS – especially on the laptop front – Thunderbolt 3 can be an effective way of adding functionality to a Mac. For example, you can introduce more graphics grunt via an external GPU box, which now natively supports the latest AMD Radeon cards on macOS. It's also simple to add extra storage space, as the bandwidth of Thunderbolt 3 can easily cope with the much faster SSDs. Thunderbolt 3, as it uses the same connector as USB-C, means you can connect a plethora of peripherals to your Mac.

There are signs that the pro software market is sticking with the Mac. GPU render engines such as Redshift and AMD ProRender are available for macOS with the correct (legacy) hardware, and Final Cut Pro X and Logic Pro X are back at the forefront of their respective creative fields – especially when combined with Apples new Pro hardware.

Finally, it's possible to run Windows through any Mac via the Boot Camp software, turning your Mac into a multi-platform solution.

Time to switch?

As with all things creative, everyone has their own workflow and solution. If your Mac is covering all your work needs, then we wouldn't recommend making a switch – especially with Apple resurgent in the professional market.

However, for new and existing 3D artists, it's worth exploring Windows for the potential benefits it may offer. Windows machines offer cheaper creative solutions and form factors, such as pen-enabled touchscreens, tablets and multi-GPU desktop monsters that can chew through render tasks as fast as you can throw them at them. Plus, they can be upgraded with stock components to make your investment last.

Whichever computer platform you choose to use, there is nothing to be afraid of. Both options are interchangeable, and there has never been a better time to craft a bespoke creative solution for your needs.
Share:

New iPad Air and Mini come with Apple Pencil support

It's hard not to love the Apple Pencil. It's one of the best styluses we've ever used, and it provides an impressively natural drawing experience. The only problem with it is that until recently you needed an iPad Pro to use it; Apple launched a 9.7-inch iPad with Pencil support last year, but the rest of the range remained Pencil-less.


That is, until today. Apple has just announced a bunch of new iPads, and they all support the Pencil. Now, whatever size iPad you prefer, you're able to sketch and draw to your heart's content with one of our favourite styluses.


Top of the range is the new iPad Air. We're big fans of this lightweight, super-slim model with its ultra-thin bezel, and the latest version has us rather excited.

The new iPad Air runs off the same A12 Bionic chip found in the iPhone XS, making it perfect for all the best drawing apps for iPad. It also features Touch ID and a choice of 64GB or 256GB storage. Like the rest of the iPad range it comes in both Wi-Fi and cellular flavours, with prices starting at $499/£479 for the 64GB Wi-Fi model and going up to $629/£749 for the 256GB cellular option.


Hold on, though, because there's another option that's almost as thrilling. After being a little neglected for the past few years, the iPad Mini has had an update, and it could be just the thing if you want a digital sketchpad that fits in your pocket.

On top of its Pencil support, the new Mini has a 7.9-inch Retina display and also uses the A12 Bionic chip, making it a punchy little contender. Again it comes with Touch ID and a choice of 64GB or 256GB storage, and it's available now at a great price: the basic 64GB model with wifi will cost you just $399/£399, while the top-end 256GB cellular model will set you back $679/£669.


Finally, there's an updated 9.7-inch iPad, but it doesn't have us quite as enthralled as the other two. It only packs an A10 Fusion chip – no slouch, but it's not the A12 – and up to 128GB storage, but on the plus side its 32GB Wi-Fi model is great value; you can get it today for $329/£319, while the 128GB cellular version will cost you $559/£539. If you want a 'budget' iPad then this is definitely the way to go.


One thing to bear in mind with these new iPads is that they only support the 1st generation Apple Pencil (read our Apple Pencil review here). If you want the swanky new features of the 2nd gen model such as wireless charging, we're afraid you're still locked into the iPad Pro.

All the new iPads are available to order today, and if you have an old one knocking about that you're not going to need any more, Apple now offers trade-ins, enabling you to knock a chunk off the asking price of that sweet new iPad Air. Now if you'll excuse us, we have to go and check our bank balances.
Share:

12 Mac shortcuts every designer should know

A Mac shortcut is a combination of keys that, when pressed together on an Apple device, perform an action that would otherwise require a more complicated set of actions. Getting a handle on Mac shortcuts is a simple and practical way to streamline the design process, as along with all the basic shortcuts that are integral to any computer work (copy, paste, cut, and so on), Macs boast a host of less well-known examples that lie bubbling beneath the surface.


For designers, tapping into these should be as instinctual as breathing, using learned muscle memory. But that doesn't mean that every designer is getting the most out of their Mac. We have collated twelve of the most useful Mac shortcuts, which should help every designer speed up their workflow and impress their colleagues.

And if you love saving time and are after more shortcuts, then don't miss our post on top Photoshop shortcuts.

01. Close window (Command + W)

When working over a slew of different documents at the same time, it can be a great timesaver to get rid of unwanted windows using the Cmd + W shortcut, rather than clicking on the red dot in the top corner. Unlike the Quit option, Cmd+ Q, this option only closes the window you’re currently working on, keeping the program running along with any other files you have open.

02. Bring up info (Command + I)

The Cmd + I shortcut gives access to the Info dialogue box, which provides a brief overview of the properties of a file or folder, including its size, when it was first created and any metadata (relevant when checking photos). It's also the place you can find the option to designate the file a default program to open with, saving lots of hassle in the long run.

03. Quicklook (Spacebar or Command + Y)

The modern world moves at an increasingly fast pace and it’s sometimes frustrating to wait for an image to open in Photoshop CC. Macs have a preview feature called Quick Look, which gives you a fast, full-size preview of the image without having to rely on alternative software. Inspect your image – or images (in slideshow format) – by pressing Spacebar or Cmd + Y. In the latest version of OS, Quick Look also offers limited editing powers.

04. Mission Control (F3 or Control + Up)

Like a commander surveying their battlefield, designers have the option to take a bird’s eye view of all open applications in Mission Control and move smoothy between them. Switching between different windows becomes a doddle with this shortcut – press either F3 or Ctrl + Up to bring up the spread of applications and choose between them.

05. Go to desktop (Command + F3)

Over the working day, your screen can become rapidly clogged with a multitude of windows, leaving the time consuming task of mini missing or moving them to get back to the desktop. Dive through the clutter with the invaluable shortcut Cmd + F3 to immediately show the desktop, pushing all open windows aside.

This also provides an effective method for quickly saving an image from a web browser to your computer, by clicking on the image, using this shortcut, then dragging and dropping straight onto your desktop. An alternative method for achieving the same goal is by setting up a Hot Corner in the System Preferences, Desktop tab. This will allow you to access the desktop by moving the mouse cursor to that corner.

06. Duplicate a file or folder (Option + drag)

You’ll never resort to using copy and paste again, once you’ve tried this nifty time-saver. Simply click on the file you wish to duplicate, hold down the Opt and drag it away, to create an identical copy. You can do this with multiple files at once and also duplicate from one folder to another.
07. Create a New Folder (Command + Shift + N)

Since everything on a Mac is organized into folders, the creation of new ones is a regular task that prevents files proliferating out of control. Pressing Cmd + Shift+ N will immediately create a new folder and highlight the filename to type into. This is especially useful when viewing files as columns, where it’s difficult to find a place to right-click and bring up the New Folder option.

08. Screenshot a specific area (Command + Shift + 4 then drag)

When taking a screenshot with Cmd + Shift + 3, your Mac captures your entire screen, warts and all, and saves onto your desktop. To grab a specific area of the screen, without having to crop anything afterwards, press Cmd + Shift + 4 to bring up a crosshair, then simply drag it over the area you desire and let go.

09. Show/Hide Dock (Command + Option + D)

On a Macbook, it’s a constant struggle to squeeze as much out of your screen as possible. Depending on your preference, you may view the dock as a strip of pixels wasting valuable space. By pressing Cmd + Opt + D, you can hide the dock when you want the whole screen to work with, then use the same combination to bring it back when you’re done.

10. Force Quit (Command + Option + Escape)

When your Mac drops the ball and stops responding altogether, Force Quit might be your only option – once you’ve stopped screaming. Pressing Cmd + Opt+ Esc will bring up a window displaying all the currently active apps, where you can select one to Force Quit. Once the application is closed, you can reopen it and pray you haven’t lost much work.

11. Screen Mirroring (Command + Brightness Down)

Many creatives use two screens to increase productivity, often having multiple windows open simultaneously across both. But on certain occasions, such as presentations, it is necessary to use screen mirroring, where the external screen mirrors the content displayed on the Mac screen. Pressing Cmd + Brightness Down will toggle screen mirroring on-and-off, and takes a few seconds to sync.

12. Reopen the previous tab (Command + Shift + T)

With a mere slip of the hand, you could find a tab suddenly disappearing before your eyes, along with that tutorial it took you hours to find. There’s no need to panic. To open up a previously-closed tab, in any of the leading browsers, press Cmd + Shift + T. As if by magic, the old tab appears and you can get straight back to work as if nothing happened.
Share:

Boost your illustration career with these 6 tips

As a child, Victo Ngai didn't really fit in. She had moved to Hong Kong from mainland China, didn't really speak the local dialect and didn't have any friends. She discovered that she could create her own friends on paper, and those friends were actually "way cooler than the people at school". 


All that time drawing as a child has led to a successful career in illustration. Ngai has won multiple awards, including from the Society of Illustrators, and works for clients such as The New Yorker, Dreamworks and Apple. At OFFSET Dublin this weekend, she shared some insight into how she's got to where she is, and how all illustrators can approach their work and career differently in order to get where they want to go, and more importantly, take more joy from it. Here's her advice.

And if you are looking for a new career direction – in illustration or another creative field – then don't miss our design jobs page, which lists plenty of opportunities.

01. Don't take yourself too seriously


Ngai moved to the States to go to art school, and once there, she found she was bottom of the class, even though she was working hard. "While trying to pursue a passion, I stopped enjoying myself and lost my voice," she recalls.

In the end, once her teacher had pointed out what he really wanted to see was work more like the doddles in the sketchbook, she started enjoying drawing again. "I stopped worrying about coming up with something really grand, and instead just started documenting little funny moments in life," she says.

02. Don't worry about the future


Around the same period, Ngai became concerned that she would become a "one-trick pony. I was worried I was going to end up doing the same thing over and over until I died," she says. "I was 21 at the time."

I couldn't figure out how to get over this so I just ignored it and carried on, she explains. "It's kind of pointless to worry about things I'm not ready to tackle. My energy is much better spend focusing on the now and making sure I'm giving everything my best shot."

03. Push yourself


"Usually it's the last 10 per cent that separates a mediocre piece from a good piece," says Ngai. "And it's the last one per cent that really makes it."

Ngai gives an example of when she was working on a piece for The New Yorker, which showed butterflies as leaves. It was approved, she says, but she wasn't happy with it. She asked for more time and discovered that she really liked a 'melty' sort of look she was able to achieve with the Liquify tool in Photoshop. But as using this tool meant the image wouldn't be high enough resolution for print, she ended up remaking the entire illustration. And she thinks the piece is much better for it.

04. Find the fun part

"There are no boring assignments," says Ngai. "Only boring solutions." There's always something you can find in an article that's interesting. When choosing a way to go for an image, aim for "something you'll enjoy that captures the spirit of the story without giving away the ending."

Don't be afraid of adding personal touches in your client work, either. In one piece of client work, Ngai added a fox, because she likes foxes. Though if the client had asked why it was there, she stresses, I would've said it's to bring out the red in another part of the piece. "But really it's just to make myself happy."

You also need to tell your story with strategic composition. "Illustration is like a puzzle," says Ngai. "You have to make every piece fit for the whole thing to work."

05. Turn limitations into assets


When you get a brief that seems like it might be dull or complicated, it's your job to think about what you want to draw, and see how you can work that into the brief, says Ngai.

She gives the example of a piece of work for Cincinnati Magazine. The article was about new imaging technology that helps doctors accurately locate cancer cells. There were several potential problems in the piece, she didn't want the piece to be too dark or negative – for serious subjects like this, sometimes a lighter tone is needed – she didn't want to include images of breasts, as that isn't allowed in American magazines ("unless you're Playboy"). On top of that, she didn't know what this new imaging technology might look like.

Instead of despairing in this, she had to come up with a metaphor, and chose to use a maze. This is a cliché, she says, "but clichés are clichés for a reason, they're powerful signifiers. People know what you're talking about."

If you have one strong cliché in your work, you can use it as a "Rosetta Stone for the viewer to decode the other metaphors in your image," she says. "They should be used with caution, but if you can make them visually engaging, then go ahead."

In this image, she concludes, "The result is more interesting because of the limitations."

A similar thing happened with her illustrations for American Express. She found the edges of the card to be a limitation, and so turned them into an asset by making the card's border a key part of the piece.

06. Find your niche

Finding the right clients is key, says Ngai. "Why shouldn’t you find your own niche and cultivate your list of clients who appreciate what you do? The best work comes out when the other person trusts you, and you trust them to trust you."

You also should be careful of doing too much work that you're not interested in or not proud of. "What we get hired for is what goes into our portfolio, so if we keep making concessions, we’ll get further and further away from the feeling we had when we had when picking up tools as a kid." So if you ever feel you're making concessions, just remember it was when Ngai rediscovered that childlike delight in drawing that her career really began.
Share:

Popular Post

Web Design

5 Quick-fire portfolio tips from design experts

Your design portfolio is one of your most useful tools. It can win you commissions, help you snag a new design job, attract collaborators, a...

Labels

Most view post