

Catering both to users on lightning-fast connections in Seoul, and users in rural India on an outdated phone, is the latest usability challenge, and Progressive Web Apps are the solution.
Though Progressive Web Apps bring a lot of benefits and functionality to the web, they don't require rewriting your entire application. Any app can be converted to a PWA by adding a few extra layers to it.
For best results, you'll want to put a strong emphasis on performance from the beginning – but that's true of any web app. Here, we'll walk through the steps to make your app progressive.
01. Serve over HTTPS
Let's be honest: you should be doing this anyway. SSL adds an extra layer of security to the web, helping your users feel secure in using your site. With PWAs, HTTPS is essential for using service workers and allowing home screen installation. You can purchase an SSL certificate from your domain registrar at little expense and then configure it through your hosting service.02. Create an application shell
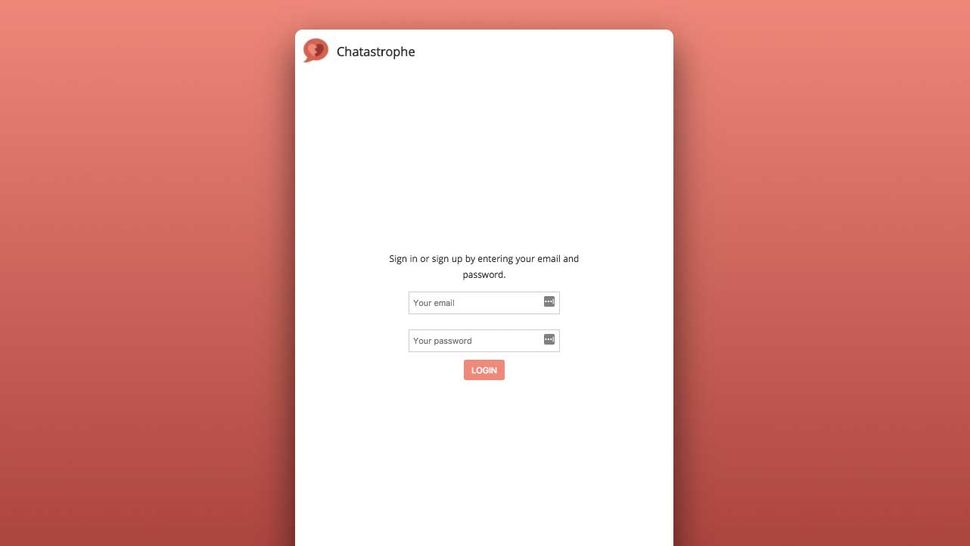
Your app shell is the first thing that loads – the first thing the user sees. It should be exist entirely in your index HTML document, with inline CSS, to ensure it appears as fast as possible and your user isn't staring at a white screen for longer than necessary. The application shell forms part of the pattern of progressive enhancement. Your app should give the user content as soon as possible, and then progressively enhance it as more data (likely JavaScript) loads.The example below is taken from a React.js application. The user is presented with an outline of the app and a loading indicator in the index.html. Then, once the JavaScript loads and React boots up, the full application is rendered within the shell.
<!--index.html-->
<body>
<div id="root">
  <div id="container">
  <div class="inner-container">
  <div id="header">
  <img src="/assets/icon.png" alt="logo" />
  <h1>Chat</h1>
  </div>
  <div id="loading-container">
  <img src="/assets/icon.png" alt="logo" id="loader"/>
  </div>
  </div>
  </div>
  </div>
</body>
// index.js
ReactDOM.render(
<App />,
document.getElementById('root')
);
03. Register a service worker
To tap into the full spectrum of PWA goodies (push notifications, caching, install prompts) you will need a service worker. Luckily, they're pretty easy to set up. Below, we first check if the user's browser supports service workers.
Then, if so, we can move ahead with registering the service worker file, here called service‑worker.js. Note that you don't need anything special inside that file at this point – it can be blank. In the example below, however, we show how to tap into the three key service worker lifecycle events.
These are 'install', when the user first visits your page; 'activate', right before registration completes; and 'fetch', when the application makes a network request. The last one is relevant for caching and offline capability.
<script>
  if ('serviceWorker' in navigator) {
  window.addEventListener('load', function() {
  navigator.serviceWorker.register('service-worker.js').then(function(registration) {
  // Registration was successful
  console.log('Registered!');
  }, function(err) {
  // registration failed :(
  console.log('ServiceWorker registration failed: ', err);
  }).catch(function(err) {
  console.log(err);
  });
  });
  } else {
  console.log('service worker is not supported');
  }
  </script>
// service-worker.js
self.addEventListener('install', function() {
  console.log('Install!');
});
self.addEventListener("activate", event => {
  console.log('Activate!');
});
self.addEventListener('fetch', function(event) {
  console.log('Fetch!', event.request);
});
04. Add push notifications
Service workers allow your users to receive push notifications via the web Push API. To access it, you can tap into self.registration.pushManager from within your service worker file. Since the sending of push notifications relies heavily on your backend setup, we won't dive into it here.If you're starting an app from scratch, Google's Firebase service comes with Firebase Cloud Messaging for relatively painless push notifications. The code below shows how to register for push notifications via the Push API.
navigator.serviceWorker.ready.then(function(registration) {
  if (!registration.pushManager) {
    alert('No push notifications support.');
    return false;
  }
  //To subscribe `push notification` from push manager
  registration.pushManager.subscribe({
  userVisibleOnly: true //Always show notification when received
  })
  .then(function (subscription) {
  console.log('Subscribed.');
  })
  .catch(function (error) {
  console.log('Subscription error: ', error);
  });
})
05. Add a web app manifest
In order to make your application installable, you need to include a manifest.json in the application's root directory. You can think of this as a description of your application, similar to what you might submit to the App Store. It includes icons, a splash screen, a name and a description.There's also some configuration for how your application appears when it is launched from the user's home screen: Do you want to show the address bar in the browser or not? What colour do you want the status bar to be? And so on. Note that a proper manifest.json should include a full spectrum of icon sizes for various devices. The code below is a preview of some of the properties your manifest can include.
{
  "short_name": "Chat",
  "name": "Chat",
  "icons": [
  {
  "src":"/assets/icon.png",
  "sizes": "192x192",
  "type": "image/png"
  }
  ],
  "start_url": "/?utm_source=homescreen",
  "background_color": "#e05a47",
  "theme_color": "#e05a47",
  "display": "standalone"
}
06. Configure the install prompt
When a user visits a PWA with a service worker and manifest, Chrome will automatically prompt them to install it to their homescreen, given the following: the user must visit the site twice, with five minutes between visits.The idea here is to wait until the user demonstrates interest in your application, and then ask them to make it a fixture of their device (this is in sharp contrast to the native app approach, which asks for that investment up-front).
But there may be cases where you want to show the install prompt in different situations, such as after the user takes a particular usefull action. To do so, we intercept the before install prompt event and save it for later, then deploy the prompt when we see fit.
window.addEventListener('beforeinstallprompt', e => {
  console.log('beforeinstallprompt Event fired');
  e.preventDefault();
  // Stash the event so it can be triggered later.
  this.deferredPrompt = e;
  return false;
  });
// When you want to trigger prompt:
this.deferredPrompt.prompt();
  this.deferredPrompt.userChoice.then(choice => {
  console.log(choice);
  });
this.deferredPrompt = null;
07. Analyze your app's performance
Performance is the heart and soul of PWAs. Your app should be fast for users on all network conditions. Caching and offline capability helps a lot, but at the end of the day, your application should be speedy even if the user does not have the browser to support service worker technology. This is the definition of progressive enhancement – provide a great experience for everyone, regardless of device modernity or network conditions.To do so, a useful set of metrics is the RAIL system. RAIL is what Google calls a 'user-centric performance model' – a set of guidelines for measuring our app's performance.
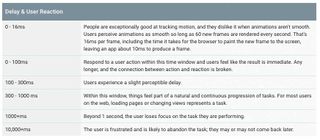
The acronym stands for Response (how long it takes for your app to respond to user actions), Animation (keeping animation speed at 60fps), Idle (using time when your app isn't doing anything else to load and cache additional assets) and Load (loading your app in one second or less).
Here is a table of meaningful benchmarks for application loading, as supplied by Meggin Kearney, the tech writer at Google Web Fundamentals.
08. Audit your app with Lighthouse
Google is the biggest champion pushing Progressive Web Apps as the future of the web. As such, it has supplied a useful tool for guiding your PWA development.Formerly called Lighthouse and supplied as a Chrome Extension, as of Chrome 60 it's a part of the Chrome DevTools, under the 'Audits' tab. What Lighthouse does is run your application under different conditions and measure its response and success according to PWA guidelines. It then gives you a score out of 100. It can also score your app on web best practices at the same time.
The following text is a list of the values Lighthouse measured. In use also shows descriptions.
- Registers a Service Worker
- Responds with a 200 when offline
- Contains some content when JavaScript is not available
- Uses HTTPS
- Redirects HTTP traffic to HTTPS
- Page load is fast enough on 3G
- User can be prompted to install the Web App
- Configured for a custom splash screen
- Address bar matches brand colors
- Has a <meta name="viewport"> tag with width or initial-scale
- Content is sized correctly for the viewport


You explained the topic very well. We are a reputed Progressive Web App Development Company and we delivered successful web solutions to top-rated companies.Progressive Web App Development
ReplyDeleteProgressive Web Appsare the latest trend in web development and can be a great way to add extra functionality to your website. When you build a PWA, it is a web application that uses web technologies to deliver rich experiences to users in a lightweight, installable, and re-engage able way. These applications can be installed on the device and appear like any app or software that is available for the particular device.
ReplyDelete